HP LaserJet 1300 Printer Installer Driver & Wireless Setup
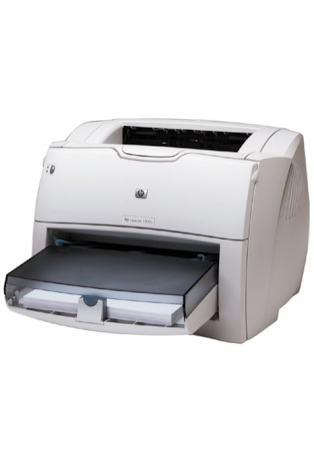 |
| HP LaserJet 1300 |
HP LaserJet 1300 Printer Installer Driver & Wireless Setup - HP LaserJet 1300 have some big shoes to fill, replacing one of our favorite personal monochrome lasers, the LaserJet 1200. The LaserJet 1300 keeps the same look and hues, right down to its sloped-front design and front-loading paper tray. It also provides a number of options unavailable in the earlier model, such as wireless networkability and more memory. However somehow, the excellent print quality of the LaserJet 1200 got lost along the way along with a lot of our enthusiasm for this otherwise promising personal laser printer.
Setting up and also installing the LaserJet 1300 is simple. Unfortunately, like most vendors these days, HP does not include a USB or parallel-port cable. The printer's box includes nearly everything you require: a toner cartridge, a power cord, a printed setup guide, and an installation CD. The printed guide provides step-by-step instructions, with easy-to-follow illustrations. The CD includes an expanded user guide that covers most installation problems. It also offers complete descriptions of LaserJet 1300's improvements over the LaserJet 1200 and of many extracost options.
OS X 10.9 / Windows 10 32-bit / 10 64-bit / 8.1 32-bit / 8.1 64-bit / 8 64-bit / 8 64-bit / 7 32-bit / 7 64-bit
HP LaserJet 1300 Driver and software setup
Step 1: How to Install Driver with free Download, no CD (automatic Wizard)
- You are required to have a driver setup file or software HP LaserJet 1300. To setup the driver files, you simply click the link below to download.
- Must have a USB cable connector from the printer to the computer that you will get from the printer package.
- You must start the computer and printer.
- But, try not to connect the USB cable printer first suggested.
- Download the setup driver and install it on your computer by following all the instructions for the installation progress.
- Connect the USB cable from the printer after installation of driver setup is complete. In this case, the wizard will analyze when USB cable has already been connected. At the time the USB cable has been detected on your computer, it will be directed to the further instructions.
- Ffollow the instructions of the wizard to complete the installation process.
- Once everything is ready, printer can be used for the printing process.
You need to help the option "add a printer" of the built-in features of Windows. And have the Setup file the software & Drivers, also requires USB cable printer.
- Turn on the computer and your printer.
- Connect the USB cable from the printer to your computer.
- Extract the setup file HP LaserJet 1300 and also extracted their location (often found in the TEMP folder)
- Click Start à Control Panel a View device & Printer (for Windows 7 and Vista OS). For XP OS, you can click on "Fax & printer.
- Click the "Add a printer."
- After ready and adjusted to the driver's location, provide the path where you extracted the setup files.
- Follow all instructions "wizard" to complete the installation.
- The printer is ready to use on your computer.
Connect with WPS
Requirements:
- Features push-button WPS physically.
- The network should be using WPA or WPA2 security.
Step 1 and 2
- Press the "Home printer"
- Use the navigation arrows to select the icon "WLAN Setup".
- Press the left function.
- The Wi-Fi light will turn on when already enable a wireless connection. The printer searches for access that supports WPS.
Step 3
- Press and also hold the button "WPS" for 5 seconds.
- Press the "OK" button after 2 minutes.
- After the connection is made, press OK to complete the configuration.
- Install software for HP LaserJet 1300.
Step 3 : HP LaserJet 1300 Drivers Free Download installation
How to install drivers with software CD (automatic Wizard)- CD/DVD drive, plug it on your personal computer.
- CD Disk Software and Drivers that came with the printer package is required.
- The USB cable as a connector of the printer and the computer.
- After the computer and your Printer is turned on, do not plug the USB cable printer HP LaserJet 1300 before needed.
- Insert the CD for the CD/DVD drive in your computer, and follow the Setup wizard from the CD. Follow all the instructions for installation.
- Connect the printer USB cable to the computer when the setup wizard asks you to plug in the USB cable.
- Wait until the printer is detected, the USB cable and follow the wizard instructions to further the process of installation.
- When completed, you will find the printer is ready for use.
HP LaserJet 1300 Driver Download
HP Universal Print Driver for Windows PCL5 (Windows 8.1/8/7) (64-bit)
Ver. 6.1.0.20062 ~ Download
HP LaserJet USB (DOT4) communication driver for Windows 8 and Higher (Windows 10/8.1/8/) (64-bit)
Ver. 7.0.0.29 ~ Download
HP Printer Administrator Resource Kit (Windows 10/8.1/8/7) (32 & 64-bit)
Ver. 1.8.3 ~ Download
HP LaserJet USB (DOT4) communication driver for Windows 8 and Higher (Windows 10/8.1/8) (32-bit)
Ver. 7.0.0.29 ~ Download
HP Universal Print Driver for Windows PCL5 (Windows 8.1/8/7) (32-bit)
Ver. 6.1.0.20062 ~ Download
hp LaserJet 1300 printing software and utility (OS X 10.9)
Ver. 1.1.1 ~ Download
Windows:
- Look for "Windows" key on your keyboard.
- Then select "Control Panel".
- Next you see to Uninstall Programs tab, select.
- Looking for the name of the driver you wish to uninstall.
- Click "Uninstall".
- The uninstall process is complete.
- Open the Apple menu.
- Select "System Preferences".
- Select "printer and scanner".
- Select the drivers who want to uninstall.
- Click Remove.
- The uninstall process is complete
- Go to the application.
- Select "system settings".
- Select "printer". Printer window appears.
- Find the Unlock button at the top right hand, "select".
- Enter "password".
- Looking for a HP LaserJet 1300 printer driver you want to uninstall. Find the minus sign below.
- Click the "minus".


0 Comment:
Post a Comment